Help
|
|
|
|
|
Quick video guide to setting up the App and Line-us
|
|
1 / First time Line-us set up
The brief overview
The detailed description Plug Line-us into a USB battery or port and wait for the light to flash blue. Put it in Setup Mode by holding the button down for 2 seconds. The button flashes Red slowly (about once per second). Line-us is now broadcasting a new temporary WiFi network called "Line-us-Setup" and is waiting for a computer/mobile to join this network. Close the Line-us app if it is running and go to the "Settings > WiFi Network" menu on your computer/mobile. You will see the list of local WiFi Networks, select Line-us-Setup from the list. It may take your computer a few seconds to change WiFi and when it connects the Line-us button will go solid Red. You are now directly connected to Line-us and ready to tell Line-us how to join your home WiFi. Launch the Line-us app, the Line-us machine will wave its arm as it connects and a Red spot will appear above the "Setup WiFi" button. Click this button and the list of local WiFis will appear. Press Rescan if the one you wish to connect to is not in the list. Next, select the WiFi you wish to connect Line-us to, enter your Password and press CONNECT. The button will now flash Blue as Line-us looks for your home WiFi. When successful, it will go solid Blue. It might take a few seconds for the App to reconnect to Line-us. When it does, Line-us will give a wave of its arm. If it continues to flash Blue, this means it has not connected, so go to your computer/mobile WiFi settings and check it has also reconnected to the same WiFi network as you selected for Line-us. You can now start to draw with Line-us and save and share your sketchbooks with the Line-us community. The next time you turn Line-us on it will automatically connect to the last WiFi it was on. |
|
2 / Button colours
Flashing red: Setup mode, waiting for a computer/mobile Line-us is broadcasting a new temporary WiFi network called "Line-us Setup" and is waiting for a mobile or computer to join it. Solid red: Setup mode, connected to a computer/mobile Line-us is broadcasting a WiFi network called "Line-us Setup" and a computer/mobile has connected to it. Flashing blue: Trying to connect to your WiFi Line-us is trying to connect to the last WiFi that it used. If this continues to flash Blue it can not connect. Solid blue: Line-us is connected to a WiFi Open your Line-us app on your device, and it should connect. If the App does not connect check to make sure that either: 1: Your computer/mobile is on the same WiFi network as Line-us or 2: Your Line-us has been renamed. Click the "Not Connected" Button to see the Line-us machines on the local WiFi and pick your Line-us from the list. |
|
3 / Setting pen height
|
|
|
|
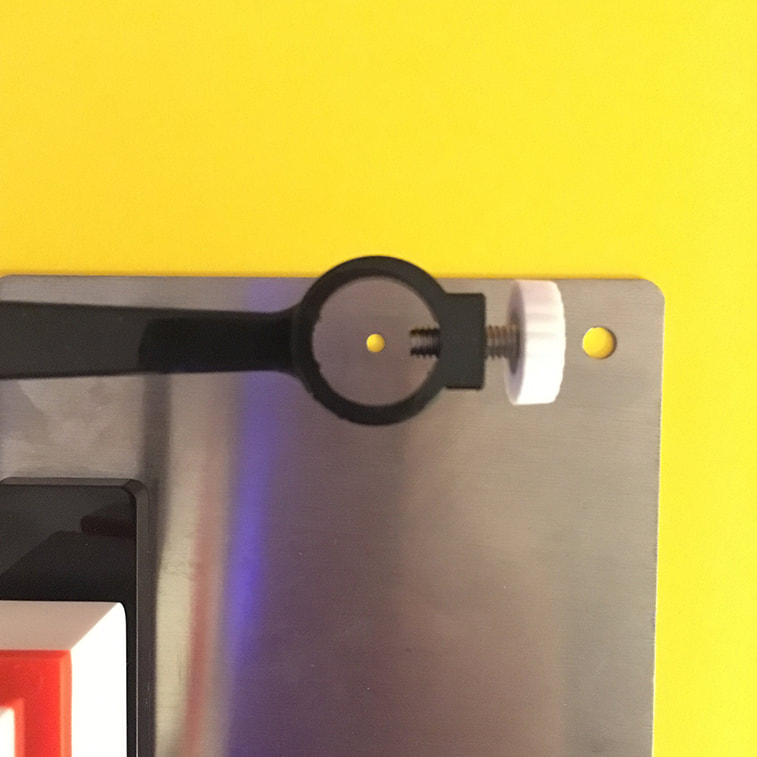
There are two ways to set the pen height depending on your preference. By experimenting with the pen height you can decide the type of line you like. Method 1 (most accurate but takes slightly longer) Make sure the App in connected to Line-us. Set up Line-us on it’s metal plate with a piece of scrap paper. Don’t put the pen in it’s holder for now. In the App, press the "Set Pen Height" button. This will move the arm to the down position. Place the pen in it’s holder so that it just touches the paper and then lightly tighten the white screw to hold the pen in place. Now you’re ready to draw. If you want to check the contact between the pen and paper in various places, you can also touch the drawing space in the App to move the arm to different positions on the drawing. If the pen is not touching the paper loosen it and let the pen drop down so that it does. Method 2 Put a coin under the pen holder. The best spacer varies a bit with each machine and we use a British £1 coin. You might need to experiment a bit to find the best spacer for your Line-us, but 2 US dimes stacked together, or any 2 Euro cents together will also work. Drop in the pen so that it touches the coin and gentle tighten the white screw. Now you’re ready to draw. |
|
4 / Folding the Line-us arm for storage
After unplugging Line-us from the power just gently fold the arm back up by hand into the position it was in when you took it out of the box. My technique is (if Line-us has his back to you) is to gently push the bottom left part of the arm and the pen holder together until the arm closes. Remember that Line-us fits in the case with the pen holder part of the arm at the bottom. |
|
5 / Taking Line-us to friend's house (changing WiFi)
|
|
|
6 / Creating your Line-us account
Your Line-us account lets you create sketchbooks to share drawings and messages. It also lets you access your sketchbooks from different computers/mobiles and connects you to the Line-us community. To make your Line-us account, open the App and go to Login > new Account. You will need:
After logging in do a drawing and press Edit > Create Icon to save the drawing as your icon. |
|
7 / Sharing
|
|
|
|
Basic concepts
How to share a Green sketchbook Click on it, then press the Orange Edit Book button to give it a Title, Description then set the cover icon to the current drawing. Press the Orange Share Book button and a list of all the visible Line-us users will appear. Find the people you wish to share with, click on them and then press Add. An Invite will be sent to the user which they can then accept or reject. Please remember to check our community guidelines when sharing. |
|
|
8 / Publishing and following
Publishing your sketchbooks and finding public sketchbooks will be added to the software very soon. |
|
|
9 / Using Line-us when WiFi is not accessible
You can use Line-us even when it can not be connected to a WiFi network. For example, Line-us will still work when access is through a browser (common in cafes, hotels, airports and some organisations), when there is no WiFi (i.e in a park), or when you don't know the password to join a network. Simply hold the button down for two seconds until the light goes Red. Line-us will then create a temporary WiFi network called "Line-us-Setup". Now you can connect to your computer/mobile, draw in the App, save to the local Sketchbook and send drawings to Line-us. Unfortunately you will not have access the cloud or internet. |
10 / Basic drawing tools
|
|
|
11 / Calibrating Line-us |
|
|
|
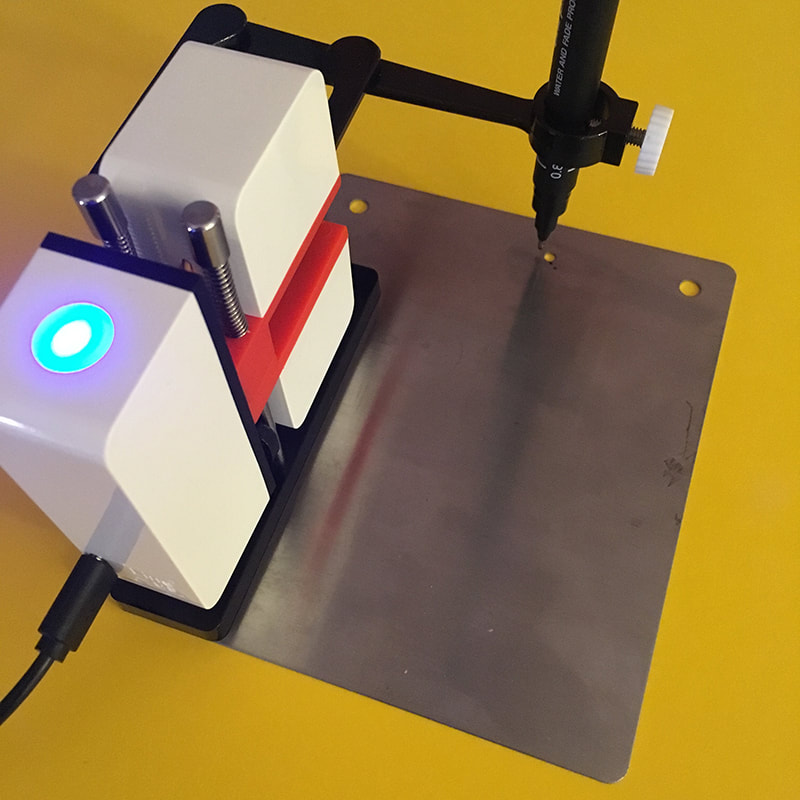
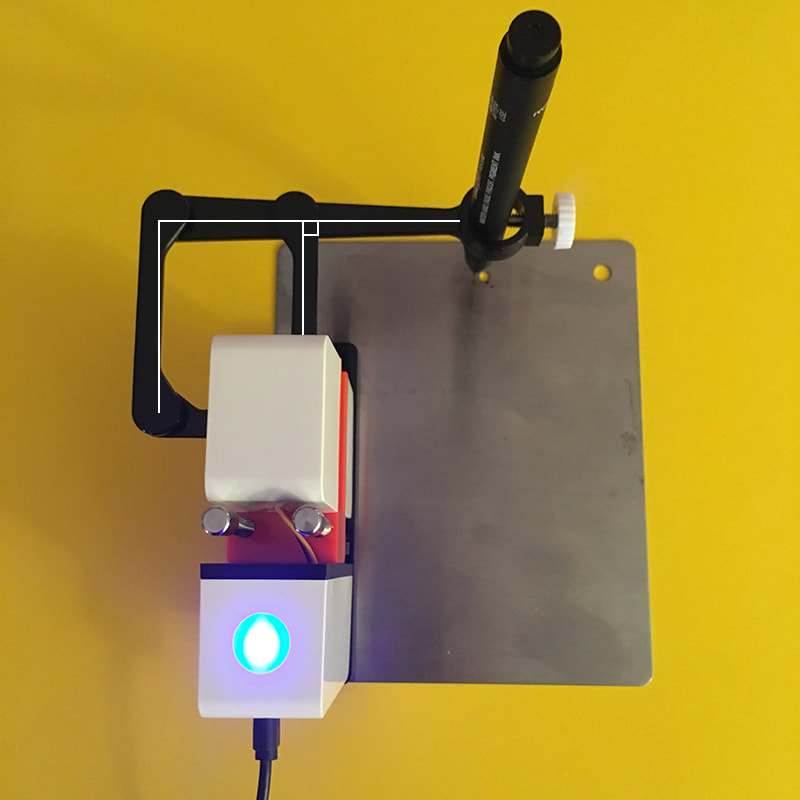
The Line-us arm has been pre-set during manufacture to a start point. This is called calibration and you should not need to reset it.
To check the arm, arrange the plate so that the small hole is at the top and to the right of the centre. Attach Line-us to the base so that it exactly lines up with the bottom left of the plate. Plug Line-us in to power and look directly down the pen holder ring. When calibrated the small hole in the plate should roughly be aligned with the centre of the pen holder ring. To make this easier you can also put a wide pen like a Sharpie in to see if the tip is above the small hole. If it is not lined up you will need to re-calibrate Line-us. Run the App connected to line in blue or red wifi mode. Scroll the top machine menu to show the Settings button and press it. A view of appears with with buttons to set the arm calibration. Press the Clear button and then press the Up, Down, Left or Right buttons until the small hole on the plate is roughly lined up with the centre of the pen holder ring. Press Save to store the new calibration in to Line-us. |